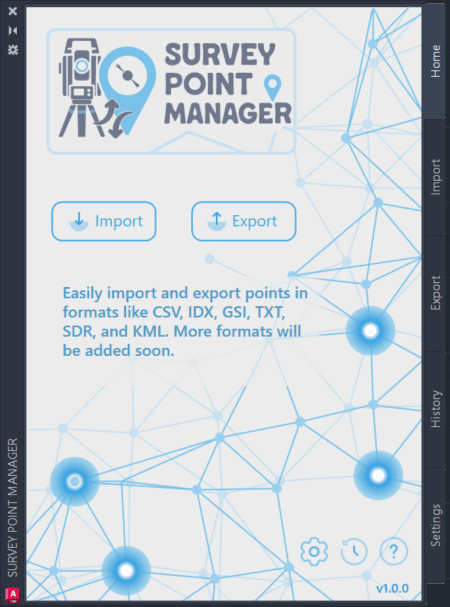
Survey Points Manager - How to Use Guide
Learn Survey Points Manager with real screenshots. Import data, export points, and create tables in 3 simple workflows.
How to Use Survey Points Manager
Learn the plugin in 3 simple workflows
Quick Start: 3 Main Tasks
1. Import Your Data
Goal: Get survey data into AutoCAD Time: 2 minutes
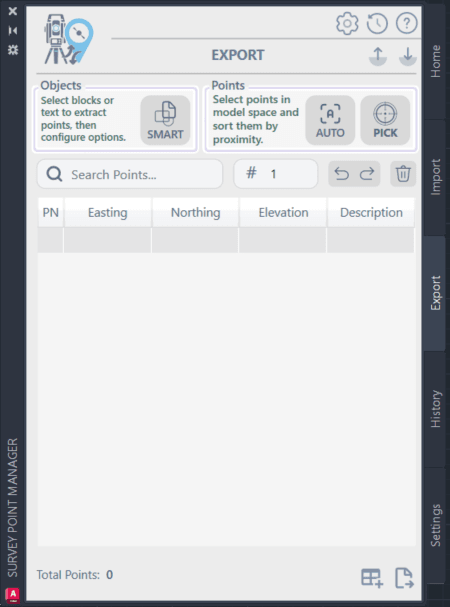
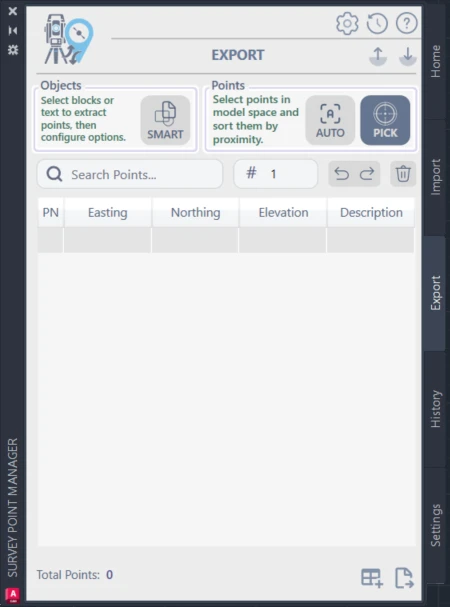
2. Export Points
Goal: Send points to other software Time: 1 minute
3. Create Tables
Goal: Make professional drawings Time: 30 seconds
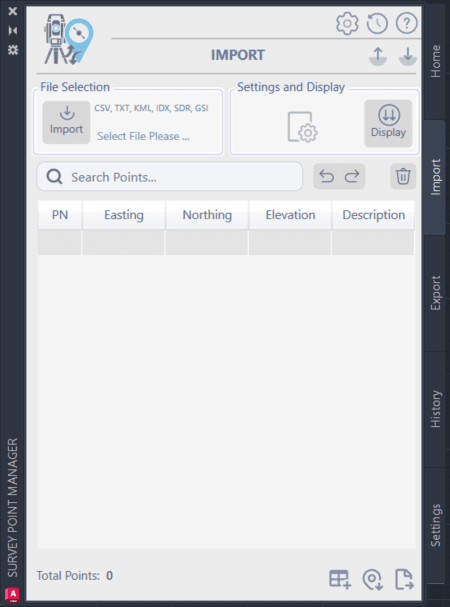
Workflow 1: Import Data (2 minutes)
Step 1: Click Import
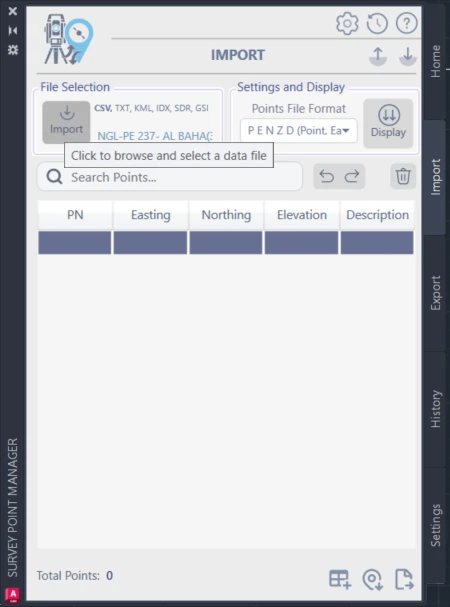
Click the Import button to begin the data import process
Do this: Click the Import button
Step 2: Choose File Format
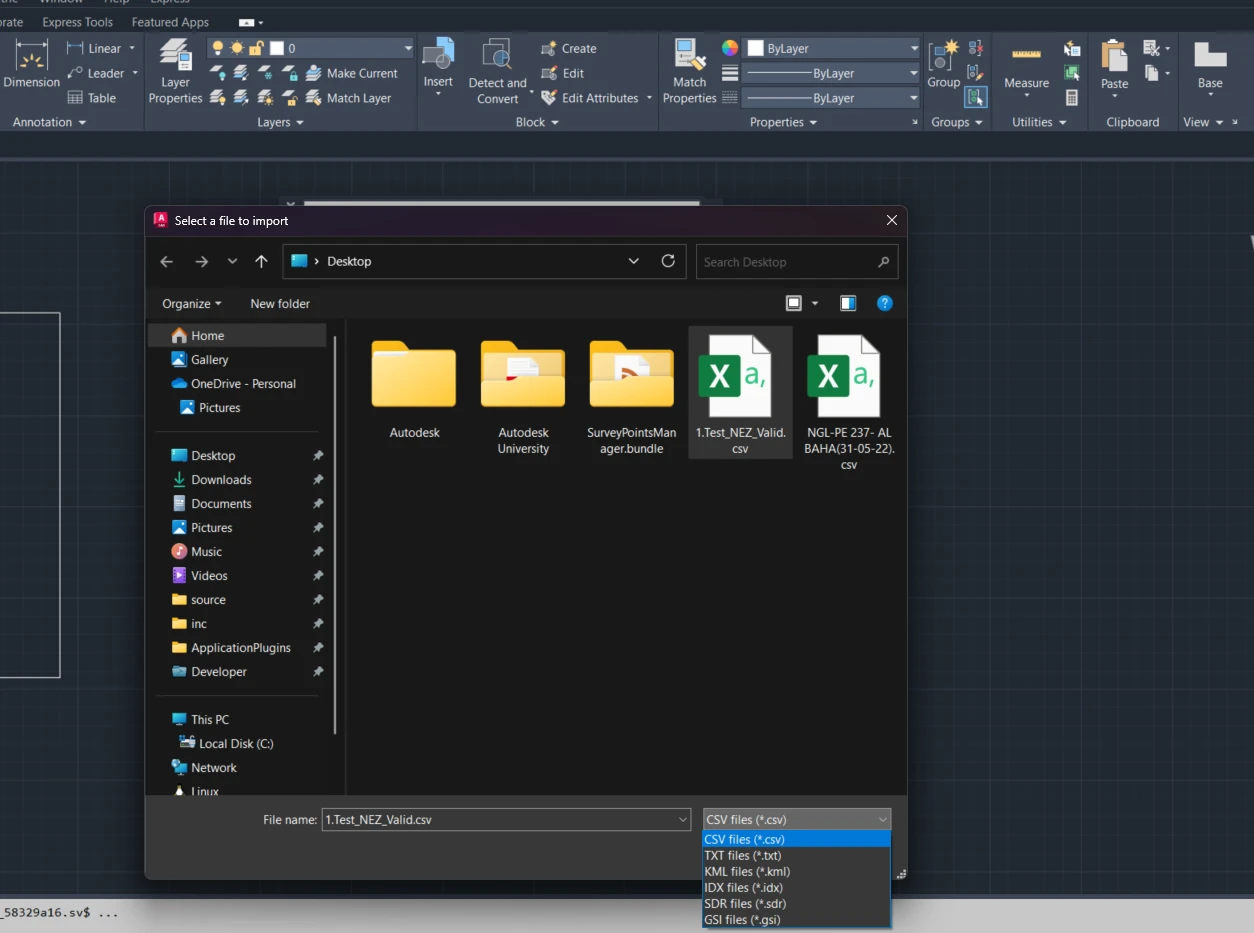
Select your desired file format and choose the data file
Do this:
- Select your format (CSV, TXT, GSI, etc.)
- Browse and select your file
Step 3: Set Format Options
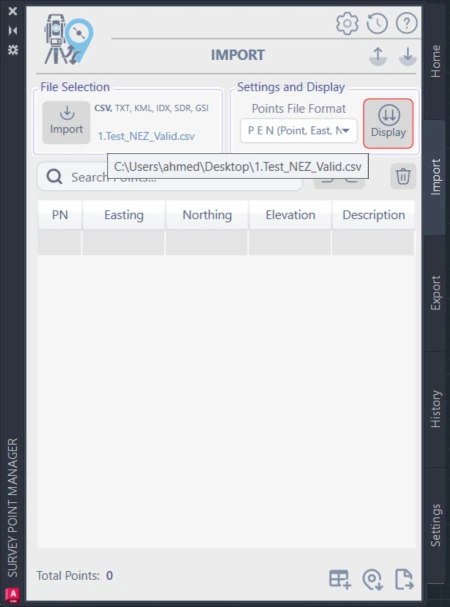
Configure format-specific settings for optimal data interpretation
Do this: Configure how to read your data
Step 4: Choose Column Order
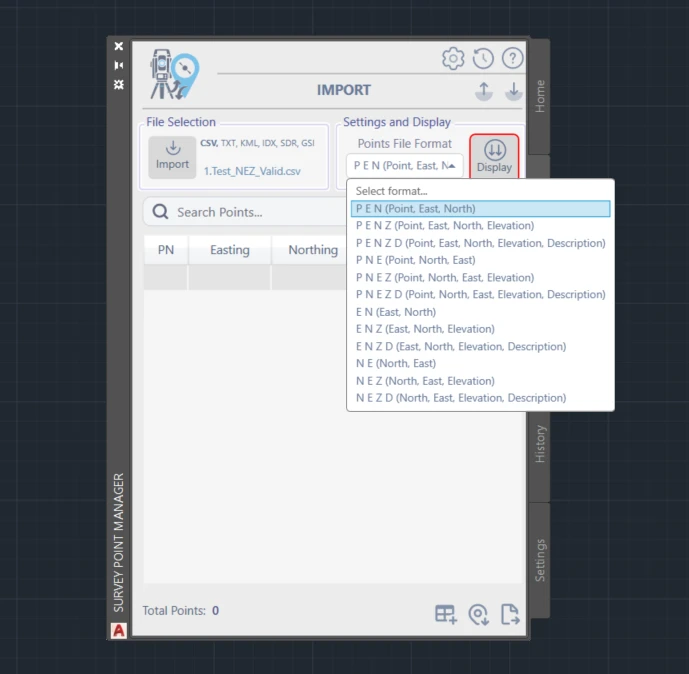
Select NEZ (Number, Easting, Northing) format for better organization
Do this: Select NEZ (Number, Easting, Northing) or your preferred order
Step 5: Display Points
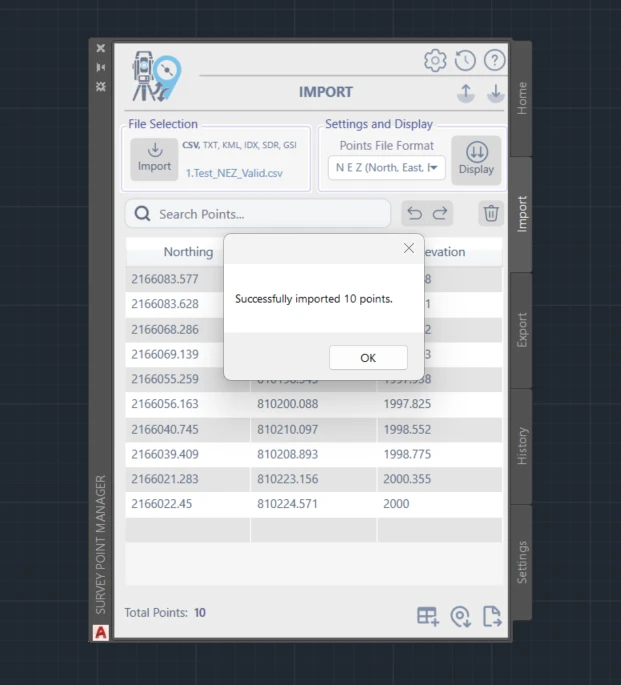
Press Display button to populate the points list with imported data
Do this: Press Display button to see your points
Step 6: Add to Drawing
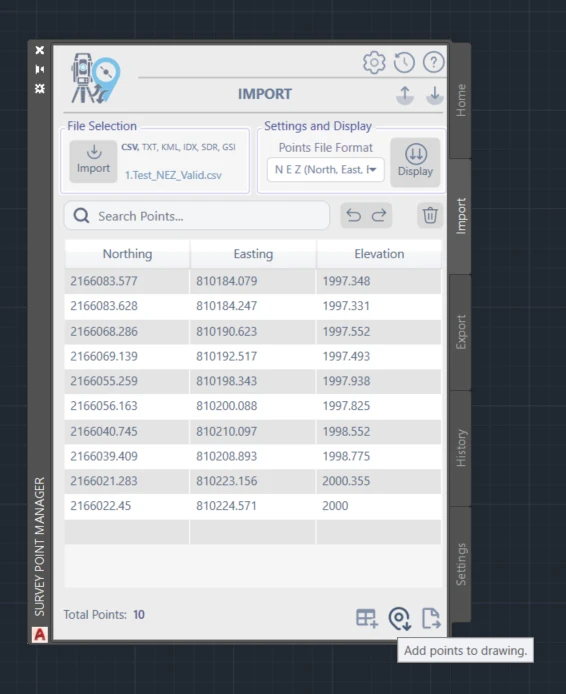
Add the imported points to your AutoCAD drawing
Do this: Click "Draw Points" to place them in AutoCAD
Result: Points in Drawing
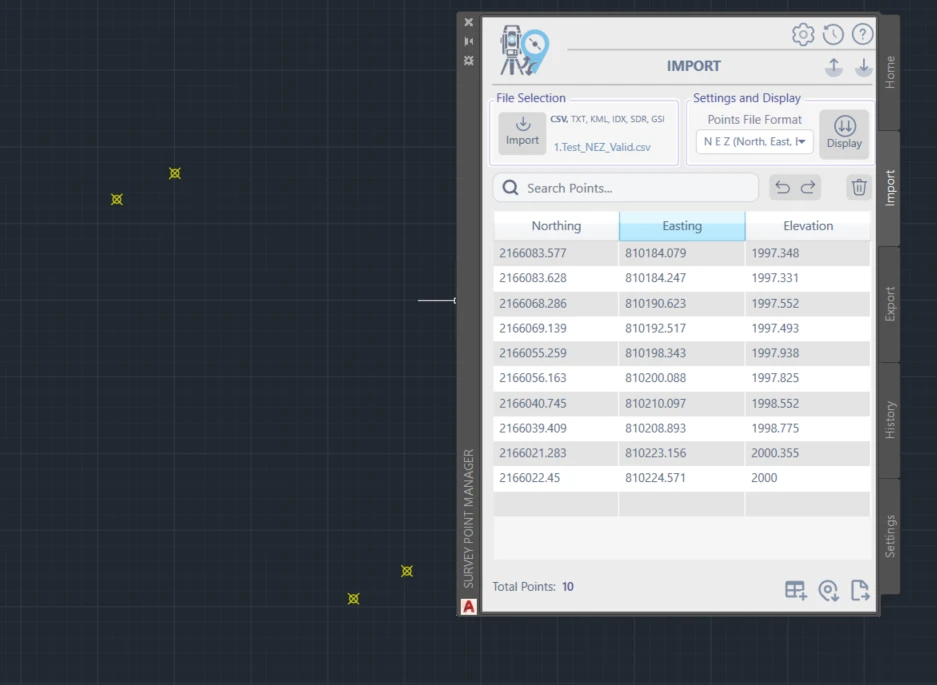
Points successfully placed in AutoCAD drawing with professional formatting
You get: Points with numbers in your drawing
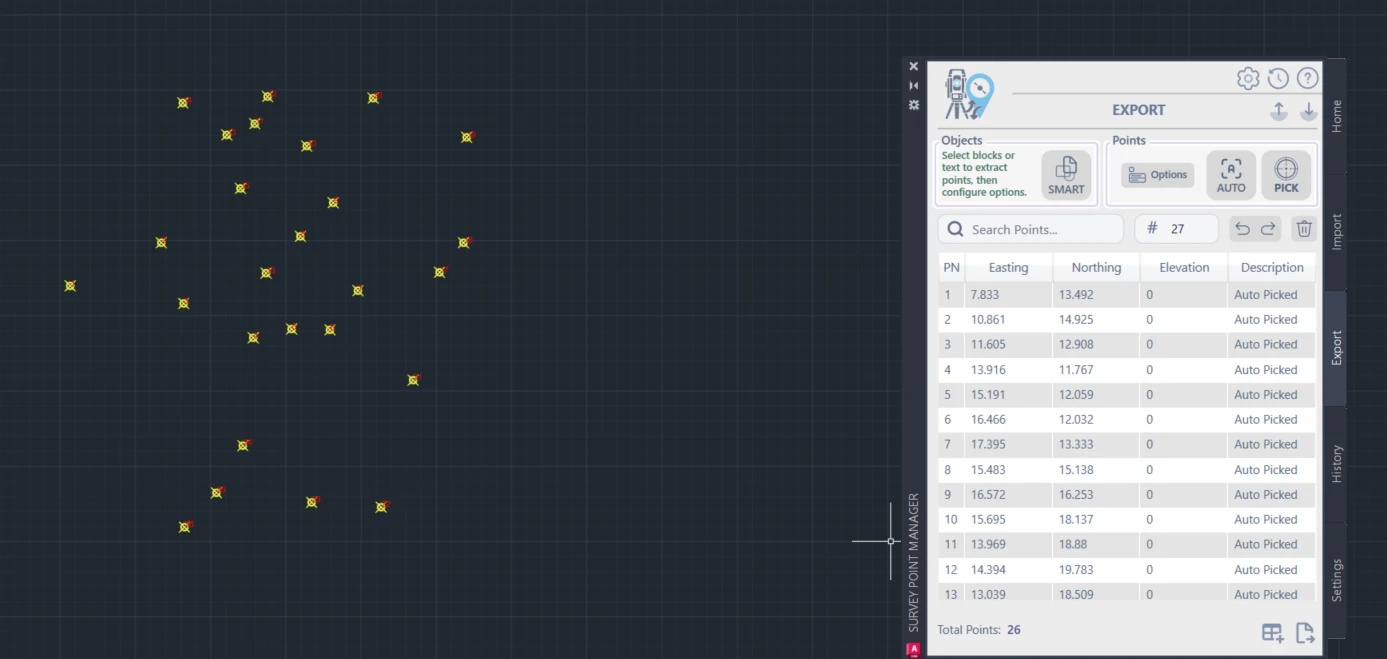
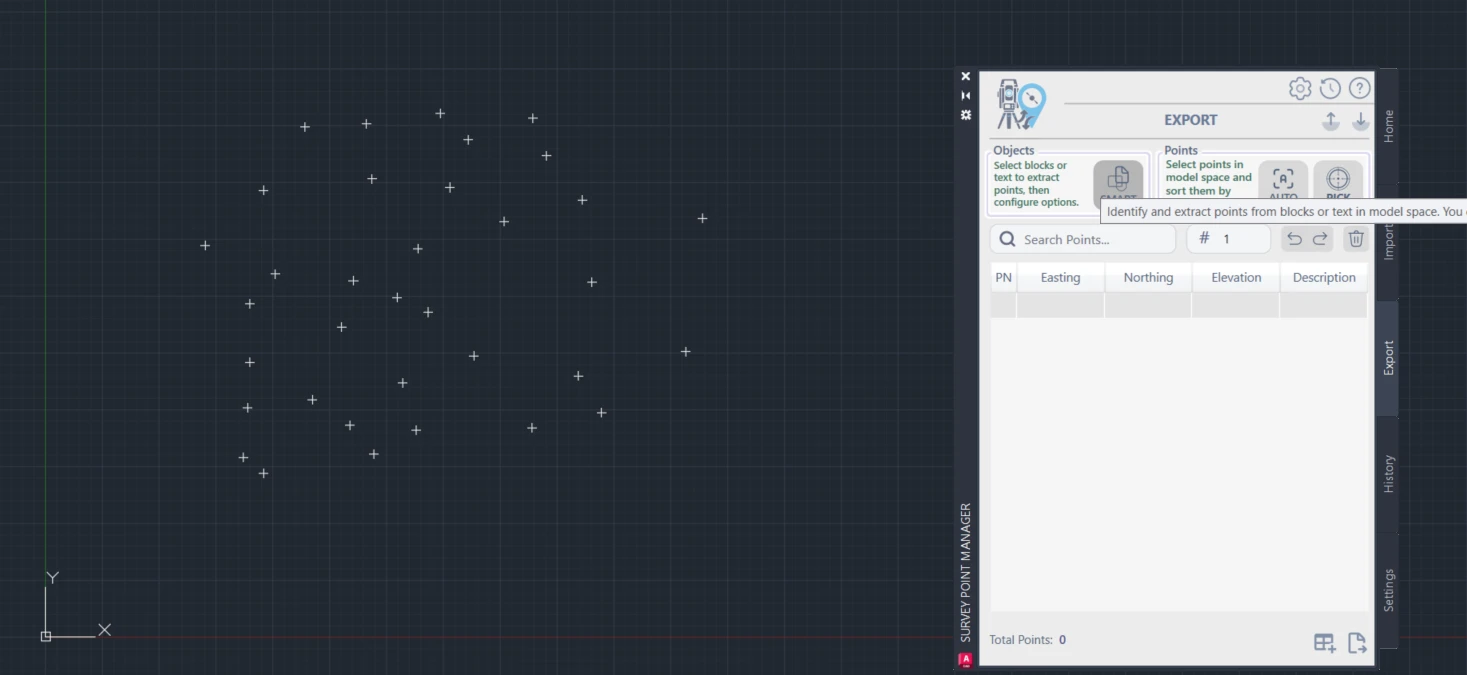
Workflow 2: Export Points (3 ways)
Method A: Manual Pick (For Few Points)
Press PICK button to begin manual point selection
Do this: Press PICK button
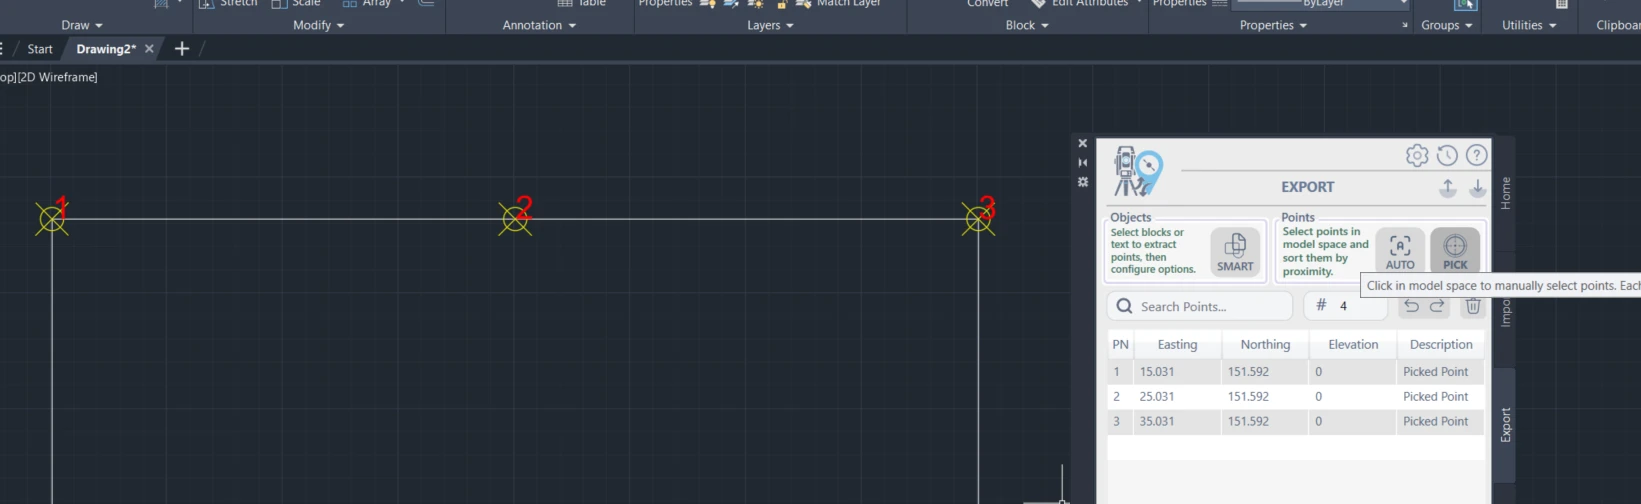
Select points from drawing; they appear in points list. Press PICK again to end
Do this:
- Click points in drawing
- Press PICK again to finish
Method B: Auto Pick (For Many Points)
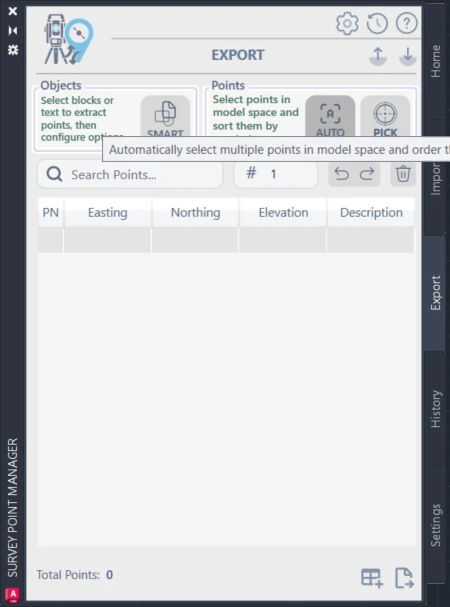
Press AUTO button to begin automatic point selection
Do this: Press AUTO button
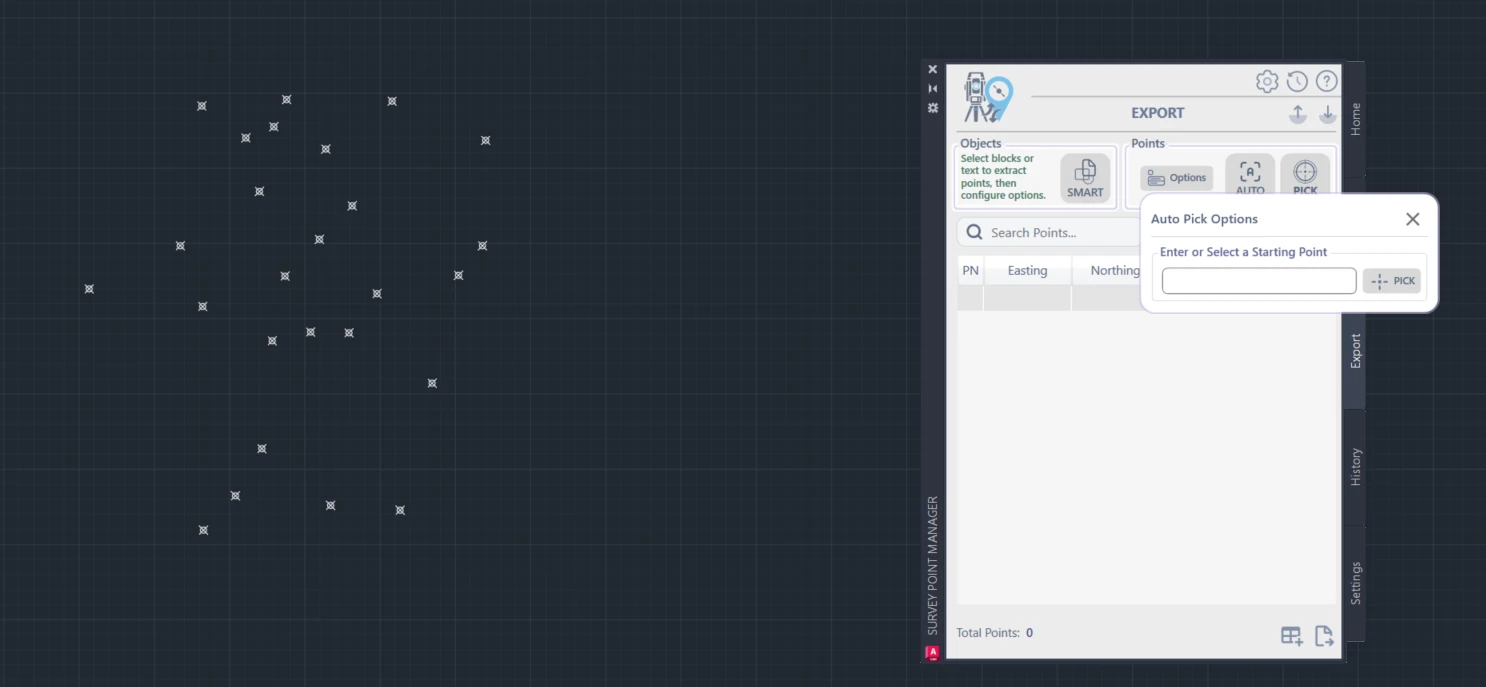
Modal requests starting point number for renumbering sequence
Do this: Enter starting point number

Select multiple points and press Enter to confirm selection
Do this:
- Select all points you want
- Press Enter
Points automatically renumbered and added to points list
You get: Points automatically renumbered
Method C: Smart Pick (For Blocks/Text)
Press SMART button to begin intelligent object processing
Do this: Press SMART button
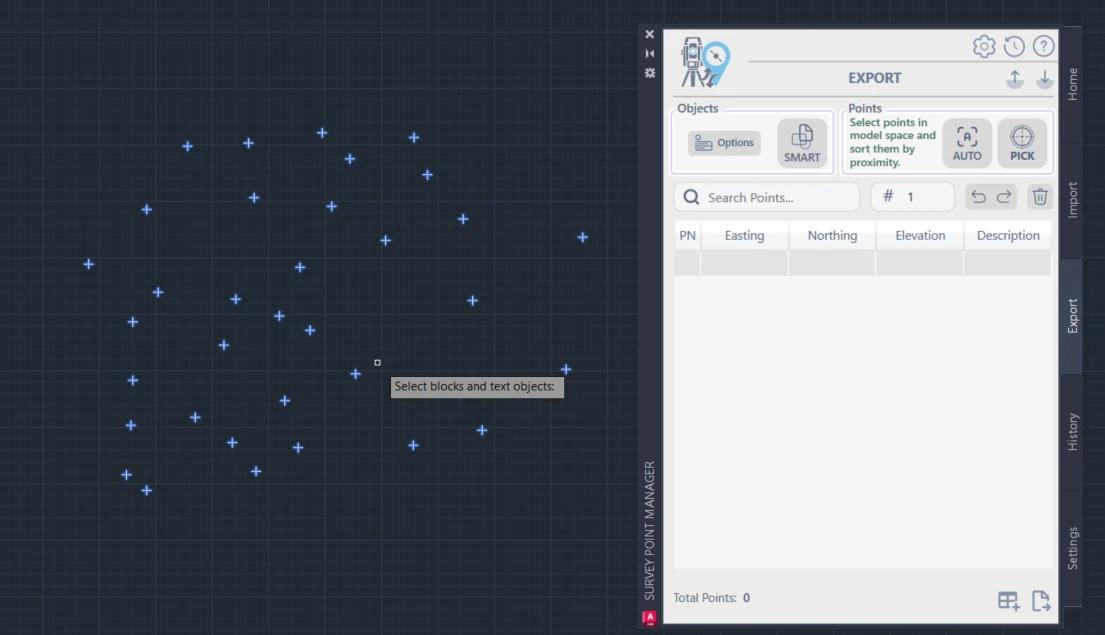
Select blocks or text objects, then press Enter
Do this:
- Select blocks or text objects
- Press Enter
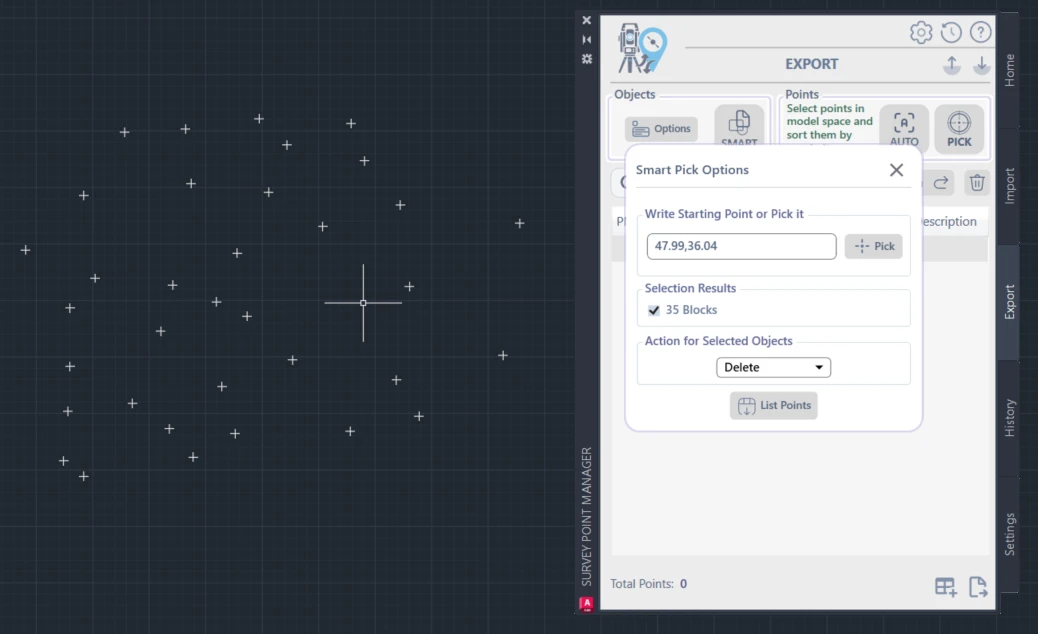
Review selection results and choose objects to add to points list
Do this: Check which objects to convert to points
Export Your Points
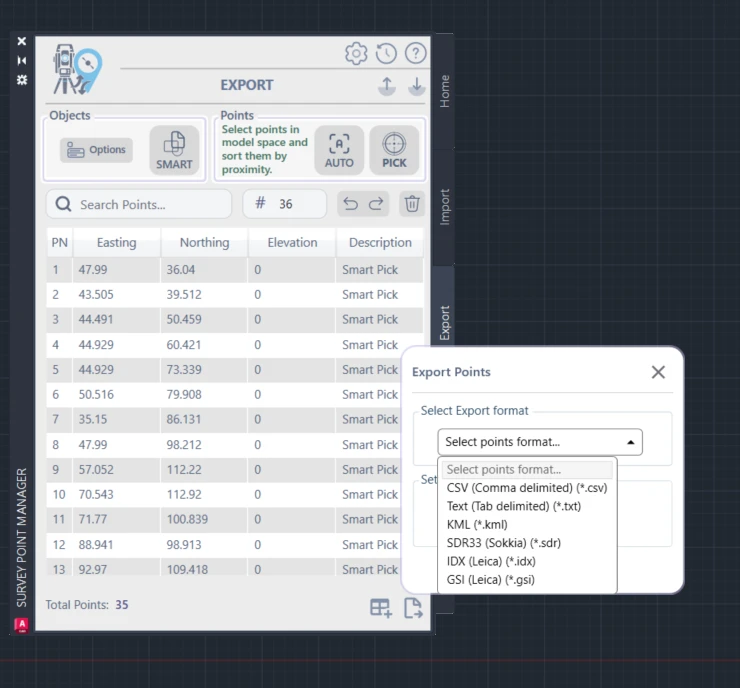
Export processed points to any available format
Do this: Choose format and export (CSV, TXT, GSI, KML, IDX)
Workflow 3: Create Table (30 seconds)
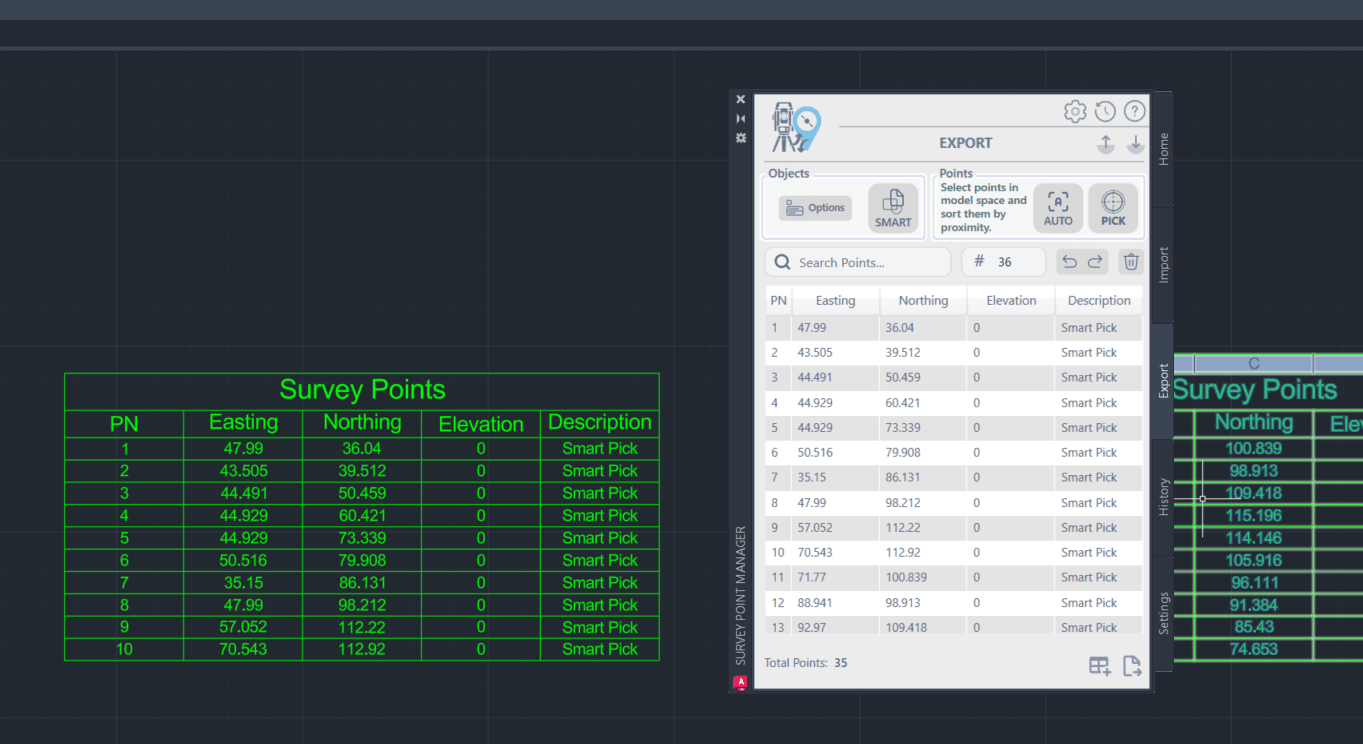 Do this: Click "Draw Points Table"
You get: Professional table in AutoCAD
Do this: Click "Draw Points Table"
You get: Professional table in AutoCAD
Interface Tabs Explained
 Home: Start here
 Import: Bring data in
Export: Send data out
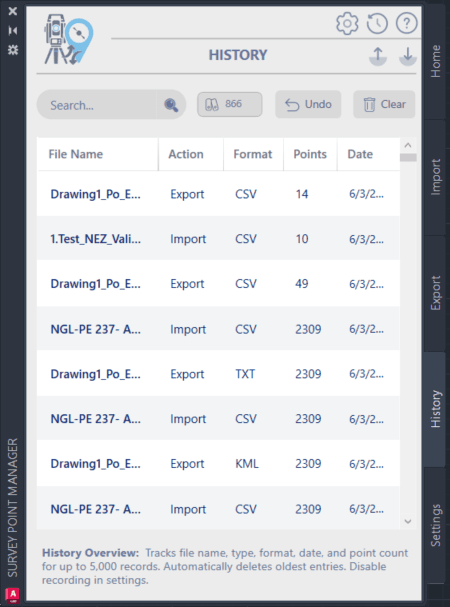 History: See what you did
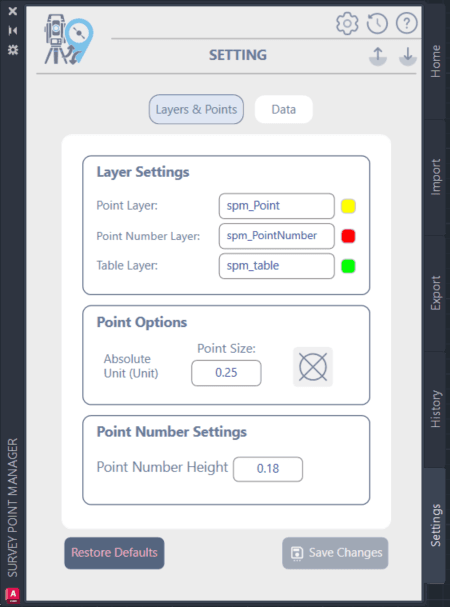 Settings: Change options
Quick Tips
When to Use Each Export Method
Manual Pick:
- Few points (under 20)
- Specific points only
- Quality control
Auto Pick:
- Many points (20+)
- Need sequential numbering
- Batch operations
Smart Pick:
- Convert blocks to points
- Extract text coordinates
- Clean up drawings
Common File Formats
CSV: Excel, databases TXT: Legacy software GSI: Leica equipment KML: Google Earth IDX: Archive storage
Settings You Should Know
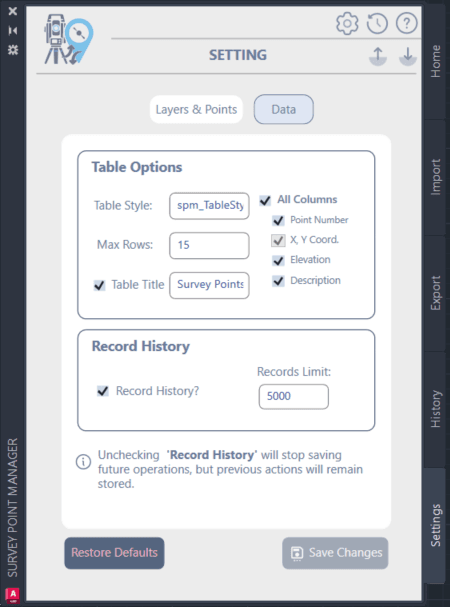
MaxRows: Set table size (5, 15, 25, 50 rows) Layers: Organize your points Precision: Decimal places for coordinates
Troubleshooting
Import Problems
File won't import: Check file format matches selection Wrong coordinates: Verify column order (NEZ vs PEN) Missing points: Check file encoding (UTF-8 recommended)
Export Problems
No points selected: Use Auto mode for bulk selection Wrong numbering: Set correct starting point in Auto mode Export fails: Check file permissions and disk space
Table Problems
Table too big: Reduce MaxRows in Settings Wrong format: Check table style settings Missing data: Verify point list has all required fields
Pro Tips
- Always check History tab - See what operations you've done
- Use Smart pick for cleanup - Convert old drawings to points
- Set MaxRows before creating tables - Avoid huge tables
- Export to multiple formats - Keep backups in different formats
- Name your files clearly - Use project codes and dates
That's it! You now know how to use Survey Points Manager effectively.
📤 Export Process Walkthrough
The export process showcases the plugin's sophisticated point selection and data output capabilities, featuring three distinct selection modes for maximum flexibility.
This comprehensive visual guide showcases Survey Points Manager as a professional, enterprise-level solution that transforms AutoCAD into a powerful survey data management platform. The real screenshots provide undeniable proof of the plugin's sophisticated capabilities and professional quality.
Survey Points Manager: Where Professional Survey Data Management Meets AutoCAD Excellence. 🏆
Leave a Comment